Secure SSH Access with TPM2-Backed Key
If you purchased a new PC after 2016, or if you have a recent Mac (M1/Intel Mac with T2 chip), these computers should come with a dedicated security processor and key storage vault. The name can be different: TPM, Secure Enclave, Pluton Processor, etc. On Windows, they are usually exposed using industry standard TPM interface. The recent major version of the interface is 2.0, and these chips are generally considered as “TPM 2.0” device (it can be either firmware-based or chip-based, but OS don’t care about it.)
Windows Hello will utilize TPM whenever possible (note: organizations can optionally disable TPM 1.2 support, TPM 1.2 only supports weak hash algorithm SHA1.) In fact, it generates a certificate pair used for mTLS authentication. The private key is secured by TPM. In this way, we can utilize the key pair (or generate dedicated certificate) for secure SSH access, without raw key file presenting on the file system.
Note: This post will also work for hardware token devices such as Yubikey (PIV mode), but TPM2 provides extra security since it is bound to the device and security attestation (device health/config measurement, TPM lockout policy, etc.) are required to utilize the key.
Prerequisites
- PC with TPM2 successfully provisioned. We will only talk about TPM-based solution on Windows (and WSL) in this post. If you have a Mac, you might want to check out this tool that stores SSH keys in Secure Enclave. If you are Linux user (with Linux on the host), check out this article.
- A supported SSH agent. I use PuTTY with CAPI support and just use Pagent in this case. For Pagent, a forwarder is also required to bridge it to OpenSSH. This forwarder also supports WSL1, but not WSL2. WSLD is recommended to bridge
wsl-ssh-pageantto WSL2. - OpenSSH client (in Windows Optional Feature) if you want to use it on Windows host. Or alternatively, just install PowerShell Core, which comes with OpenSSH client.
Certificate preparation
If you have enrolled in Windows Hello for Business, great! No more further action is required, but feel free to create a virtual smart card and create/import certificate pair if needed.
If you don’t have Windows Hello for Business, create a virtual smart card and generate a self-signed certificate:
# Enter PIN as promoted
tpmvscmgr.exe create /name vSC-SSH-PROD /pin PROMPT /adminkey random /generate /attestation AIK_AND_CERT

# Create a certificate, change subject as needed
# Note: it seems that the virtual smart card only supports RSA.
# Certain TPM do have capability to generate EC cert, but this PowerShell Cmdlet
# don't really like it. If you have figured it out, let me know
# TPM hardware crypto provider is "Microsoft Platform Crypto Provider" FYI
New-SelfSignedCertificate -Subject "CN=Nelson Palmer,OU=PKIOps SSH Auth,O=Contoso Corp" -KeyAlgorithm RSA -KeyLength 4096 -Provider "Microsoft Smart Card Key Storage Provider" -CertStoreLocation "Cert:\CurrentUser\My"
If you want to import existing SSH key pair, create a virtual smart card using the step above. Then wrap your existing SSH key into a certificate in PKCS12 format:
# Assuming SSH key is id_rsa, change as needed.
# Generate some random data
openssl rand -writerand ~/.rnd
# Create new CSR and self sign it
openssl req -new -x509 -key id_rsa -days 720 -subj "/CN=Nelson Palmer/OU=PKIOps SSH Auth/O=Contoso Corp" -out id_rsa.cer
# Export PKCS12
openssl pkcs12 -export -inkey id_rsa -in id_rsa.cer -out id_rsa.pfx
Then modify registry to allow certificate import to virtual smart card:
Windows Registry Editor Version 5.00

[HKEY_LOCAL_MACHINE\SOFTWARE\Microsoft\Cryptography\Defaults\Provider\Microsoft Base Smart Card Crypto Provider]
"AllowPrivateSignatureKeyImport"=dword:00000001
"AllowPrivateExchangeKeyImport"=dword:00000001
Import the certificate, and remember to delete these two registry values for enhanced security.
certutil -csp "Microsoft Base Smart Card Crypto Provider" -importpfx id_rsa.pfx
Add certificate & key to Pagent and services/machines
Right click on Pagent system tray icon, set these settings:

Cert Auth Prompting is optional. I set it on for enhanced security so I know if some application is requesting my SSH key.
Then click Add CAPI Key, import the certificate you just generated. Click View Keys & Certs, choose the certificate you just imported, and click Copy To Clipboard.
Add this key to your favorite services and machines.
It’s a good idea to start Pagent it on system startup.
Set up authentication forwarders/bridges
wsl-ssh-pageant
The Project site has extensive documentation on configuration. I will post my config for your reference:
wsl-ssh-pageant-amd64-gui.exe -systray -winssh openssh-ssh-agent -force
It’s a good idea to start this bridge it on system startup.
WSLD
The Project site also has extensive documentation on configuration. I will post my config for your reference:
$ cat ~/.wsld.toml
[ssh_agent]
# Default to the path below, can be omitted if unchanged
# Set `SSH_AUTH_SOCK` to the path you specified.
ssh_auth_sock = "/tmp/.wsld/ssh_auth_sock"
$ cat ~/.profile
...
# SSH Auth
export SSH_AUTH_SOCK=/tmp/.wsld/ssh_auth_sock

# Start daemon
if pgrep -x "wsld" > /dev/null
then
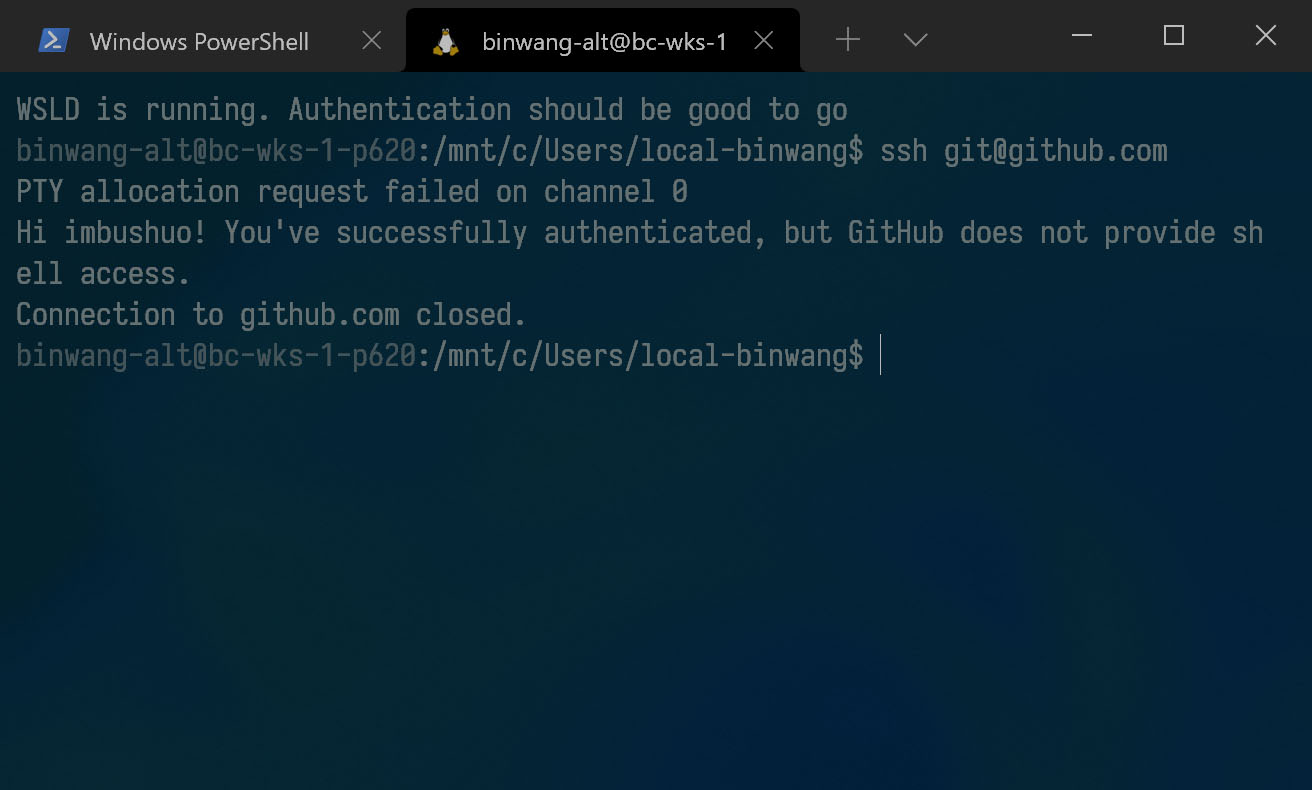
    echo "WSLD is running. Authentication should be good to go"
else
    nohup wsld > /dev/null 2>&1 &
    echo "WSLD started"
fi
WSLD also has a host portion and it needs to run with administrative privilege (here’s why), I use a task schedule item to start it on system startup.
Make applications work nicely
SSH configuration
SSH authentication forwarders are disabled by default, needs to explicitly turn it on in config:
$ cat ~/.ssh/config
Host *
    ForwardAgent yes
Remember also set SSH authentication socket environment variable SSH_AUTH_SOCK in Windows and Linux.
Git for Windows configuration
If you are using Git for Windows, tell it to use system OpenSSH:
git config --global core.sshcommand "C:/Windows/System32/OpenSSH/ssh.exe"
Note: This will break 32-bit applications such as Visual Studio 2019 due to the Windows path virtualization, as a workaround, you can use OpenSSH installation anywhere else than System32, or copy the OpenSSH directory to SysWOW64/SysArm32.
Try it
If everything works well, you should have it now.


